
Win11 Creator
Using WinUtil’s Win11 Creator
Section titled “Using WinUtil’s Win11 Creator”WinUtil includes a built-in Win11 Creator tool that lets you take an official Windows 11 ISO and produce a customized, debloated version. The resulting image can remove telemetry, bypass hardware requirement checks, and enable local account setup out of the box. You can export the result as a new ISO file or write it directly to a USB drive.
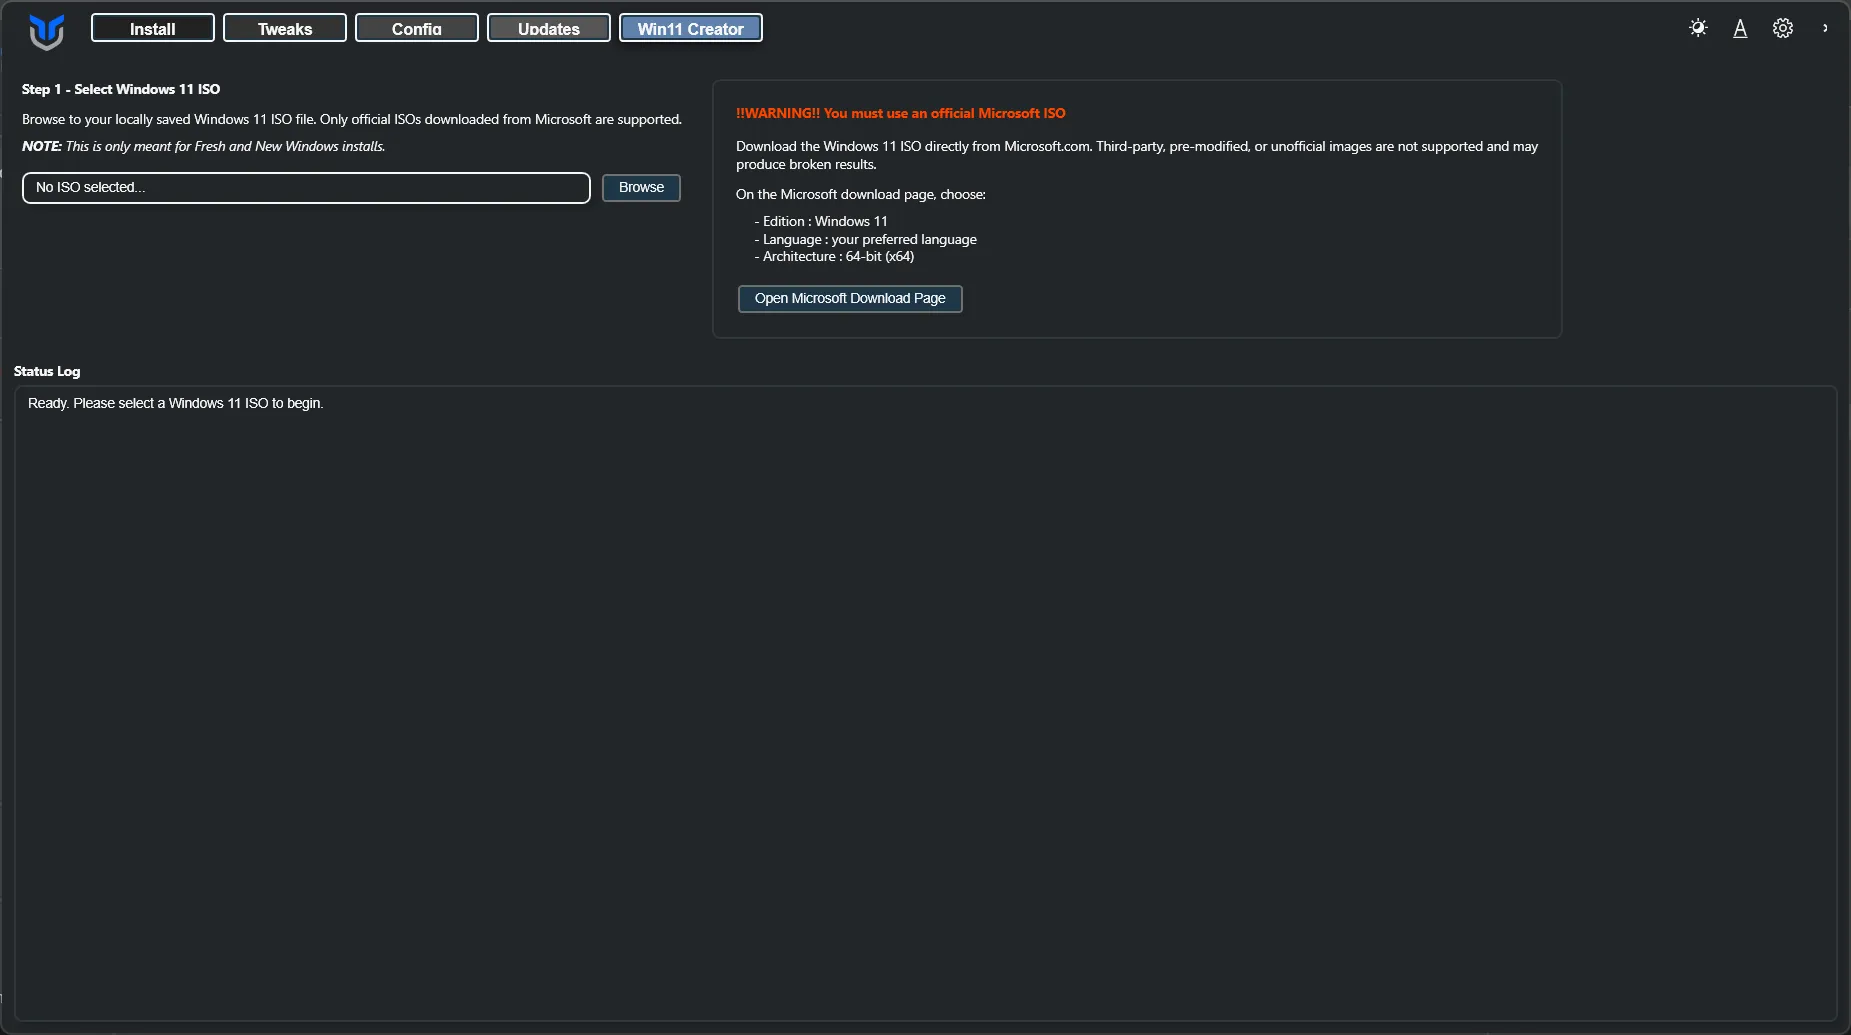
Step 1 — Select Your Official Windows 11 ISO
Section titled “Step 1 — Select Your Official Windows 11 ISO”- Open WinUtil and go to the Win11 Creator tab.
- Click Browse and select your official Windows 11 ISO file from Microsoft (must be 4 GB or larger). Custom or modified ISOs are not supported.
- The file path and size will appear on screen once selected.
Step 2 — Mount & Verify
Section titled “Step 2 — Mount & Verify”- Click Mount & Verify ISO.
- WinUtil mounts the ISO, checks for a valid
install.wimorinstall.esd, and reads the available editions (Home, Pro, Enterprise, etc.). - Once verified, select your desired edition from the dropdown — Pro is selected by default if available.
Step 3 — Run the Modification
Section titled “Step 3 — Run the Modification”Click Run Windows ISO Modification and Creator to start the customization process. WinUtil will:
App & Component Removal:
- Remove 40+ bloat apps — Clipchamp, Teams, Copilot, Dev Home, new Outlook, Bing apps, Solitaire, and more
- Delete OneDrive setup from the image
System Customization:
- Bypass hardware checks — removes TPM, Secure Boot, CPU, RAM, and storage requirement enforcement so the ISO installs on unsupported hardware
- Enable local account setup — injects an
autounattend.xmlthat skips the Microsoft account screen during OOBE - Disable BitLocker and device encryption — removes startup overhead
- Disable Chat icon — removes chat taskbar button
- Pin the selected edition during setup — writes setup metadata so OEM firmware keys for a different edition do not force the installer down the wrong product-key path
Privacy & Telemetry Tweaks:
- Disable telemetry — advertising ID, tailored experiences, input personalization, speech online privacy
- Disable cloud content features — app suggestions, Microsoft Store recommendations
- Remove telemetry scheduled tasks — CEIP, Appraiser, WaaSMedic, and others
- Disable OneDrive folder backup — prevents automatic backups to cloud
- Prevent DevHome and Outlook post-setup installation
- Prevent Teams installation — blocks auto-install after OOBE
- Prevent new Outlook Mail app installation
- Disable Windows Update during OOBE — re-enabled automatically on first login
- Disable Copilot and search box suggestions
Optional: Driver Injection
- If enabled, WinUtil exports the drivers from your current system, stages boot-storage drivers for Windows Setup, and injects eligible packages into the selected
install.wimimage. Extension-class packages and stale duplicates are excluded. Each remaining package is added separately, so one incompatible package does not stop the others. If a package fails, WinUtil discards the partial mount and retries the remaining packages against the original image. Check the live log for warnings: if every package fails, WinUtil keeps the originalinstall.wimand still produces the ISO.
A live log shows progress as each step completes. This stage usually takes 10–30 minutes depending on disk speed. The WIM dismount near the end is the slowest part, so do not close WinUtil while it is running.
Step 4 — Export Your Result
Section titled “Step 4 — Export Your Result”Once the modification is complete, choose how to save your image:
- Click Save as an ISO File.
- Choose a save location (defaults to your Desktop as
Win11_Modified_yyyyMMdd.iso). - WinUtil builds a dual BIOS/UEFI bootable ISO using
oscdimg.exe.
- Click Write Directly to a USB Drive.
- Select your USB drive from the dropdown (click Refresh if it doesn’t appear).
- Click Erase & Write to USB and confirm the warning — all data on the drive will be permanently erased.
- WinUtil formats the drive as GPT with a 512 MB EFI partition and copies the modified Windows files.
Minimum USB size: 8 GB recommended. Writing takes 10–20 minutes.
Step 5 — Clean Up (Optional)
Section titled “Step 5 — Clean Up (Optional)”Click Clean & Reset to delete the temporary working directory (~10–15 GB) and return the tool to its initial state, ready for a new ISO. You will be asked to confirm before anything is deleted.
What the Modified ISO Does Differently
Section titled “What the Modified ISO Does Differently”When you install Windows 11 from your modified ISO:
- No Microsoft account required — create a local account directly during setup
- No hardware checks — installs on machines without TPM 2.0, Secure Boot, or supported CPUs
- Dark mode enabled by default
- Empty taskbar and Start Menu — no pinned apps, Chat icon removed
- Windows Update disabled during OOBE — automatically re-enabled on first login to prevent setup interruptions
- BitLocker disabled — removes startup overhead on first boot
Troubleshooting
Section titled “Troubleshooting”| Problem | Fix |
|---|---|
| “install.wim not found” | Not a valid Windows 11 ISO — download a fresh one from Microsoft |
| “oscdimg.exe not found” | Run winget install -e --id Microsoft.OSCDIMG then retry |
| USB drive not showing up | Plug it in, wait a few seconds, then click Refresh |
| Modification seems stuck | The WIM dismount step is slow — wait at least 10 minutes before assuming it’s frozen |
| “Access Denied” error | Make sure WinUtil is running as Administrator |
| Driver injection warning | Review the live log for the named package. Other compatible packages continue; if none succeed, the ISO is created with the original install.wim |
| “Setup has failed to validate the product key” | Recreate the ISO with the latest WinUtil. The creator now removes stale PID.txt, writes sources\ei.cfg, and pins the selected image in autounattend.xml so setup does not use an embedded OEM key for a different edition |